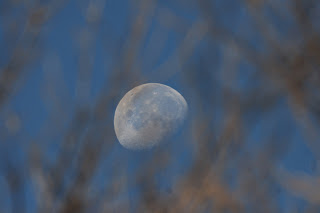
The Moon
in the day, hand-held with Orion ED80!
For
photographers, there are two kinds of equipment “fevers”: aperture and focal
length. For anyone suffering aperture fever, there is only one solution: fast,
often expensive glass. However, for anyone wanting focal length, there is a way
around buying those ungodly expensive telephoto prime lenses: astronomical
telescopes.
Everyone
is familiar with the idea of looking through a telescope to see the Moon,
stars, and planets. For astrophotogarphers, they take their pictures by
coupling their dSLRs to their telescopes. In the same way, any traditional
photographer wanting an extra-long reach can use a telescope as a terrestrial
lens, too.
Stop sign from
a quarter mile away with an 600mm scope
So, how
does one co about attaching a camera to a telescope?
First,
you'll need a T-ring and T-adapter. Together, both parts can be had for under
$20. First, the T-ring is a camera brand specific part that will mount to your
SLR in the same way as a lens will. So, if you own Canon, get a Canon mount
T-ring. Olympus? Buy an Olympus ring. The second part of the puzzle is the
T-adapter, which goes into the back of the scope itself and is universal in
nature. So, get your camera-specific T-ring and thread it onto the T-adapter.
Next, attach the ring/adapter setup to your camera just like a lens, then stick
the whole thing into the back of the telescope, being sure to secure it in
place with the thumb screws.
So, camera attached, how does a telescope work as a camera lens?
Well, when it comes to going a long way for a little cash, the telescope gets the job done in a big way. Example: Orion sells a 400mmf5 telescope for just over $120. In contrast, Canon makes a 400mm f5.6 telephoto lens that it sells for about $1,300. So, if money is your big concern, the telescope is, on the surface, just the thing for you. However, there is more to photography than saving money, so read on.
Vulture
resized, uncropped.
100% crop
Undoubtedly,
the biggest drawback of using a telescope over a conventional camera lens is
the fact that the telescope won't autofocus. For stars, this isn't a problem as
they don't move. For living subjects, though, the lack of AF can be a big, big,
problem, especially considering that there is no communication whatsoever
between the camera and the scope, which means no focus confirm, either. So,
when it comes to getting things in focus, it's all on you. If you're lucky,
your camera will have the ability to change focus screens, which means that you
can drop in one friendly to manual focus, like back in the old film days. No
MF-friendly screen/the ability to change them? Have fun trying to get the
focus!
Big problem aside, there's more. to come!
Continuing with the communication problem, when the camera and lens don't talk to each other, that means less reliable metering. Personally, my Canon 30D overexposes by about 1 ½ stops when used with the telescope, your camera/scope combo may be different, not that any of this matters if you are smart and shoot RAW format. JPEG lovers, you may want to reconsider your loyalties!
Unlike lenses, telescopes don't have image stabilization, either. At long focal lengths, it gets increasingly hard to hand-hold lenses, especially slow ones or when the light is less than ideal. Heck, even at 300mm and f5.6, many people have trouble hand-holding, so how do you think a 400, 600, or even 1,000mm lens will work? Not good! Needless to say, tripods (strong ones) are pretty much a must when using telescopes as camera lenses.
Trying to
focus can be a pain in the neck, literally, as you rack the focuser in and out.
Now a third issue: the act of focusing. When focusing, you
have to rack the focuser in and out while with lenses, if they change length at
all, will extend on the front end. Back to the scopes. Obviously, when trying
to look through a viewfinder while racking back and forth, it can be a real
pain in the neck (perhaps literally) to keep your eye to the camera. This is
especially troublesome in you like to hand-hold your telescope. Tripods will
alleviate this problem somewhat, but having to move all the time to keep your
eye up to the viewfinder is still irritating.
Okay, if you still want to use your telescope as a camera lens, know that you can produce some excellent pictures, provided you have the patience. In fact, I've seen some great bird shots taken with astronomical telescopes. My only question is this: for every good shot, how many bad ones were there? Still, as with everything else, it will take practice, but you should be able to get some good pictures with your telescope if you take the time to learn.
Okay, if you still want to use your telescope as a camera lens, know that you can produce some excellent pictures, provided you have the patience. In fact, I've seen some great bird shots taken with astronomical telescopes. My only question is this: for every good shot, how many bad ones were there? Still, as with everything else, it will take practice, but you should be able to get some good pictures with your telescope if you take the time to learn.
Courtesy : Dennis Bodzash


